Efficient SSL Certificate Management: Simplifying Renewals with Subject Alternative Names (SAN)
-
 Raman G A
- Infrastructre & hardware, Cert renewal, Certificate management
- December 1, 2023

Key Features of SAN:
- Multiple Common Names: SAN allows the inclusion of multiple common names in a single SSL certificate.
- Versatility: You can add both domain names and IP addresses, providing flexibility in certificate configurations.
- Reduction of Multiple Certs: SAN streamlines SSL certificate management by reducing the need for multiple certificates.

The Renewal Process with SAN:
A) CSR Generation:
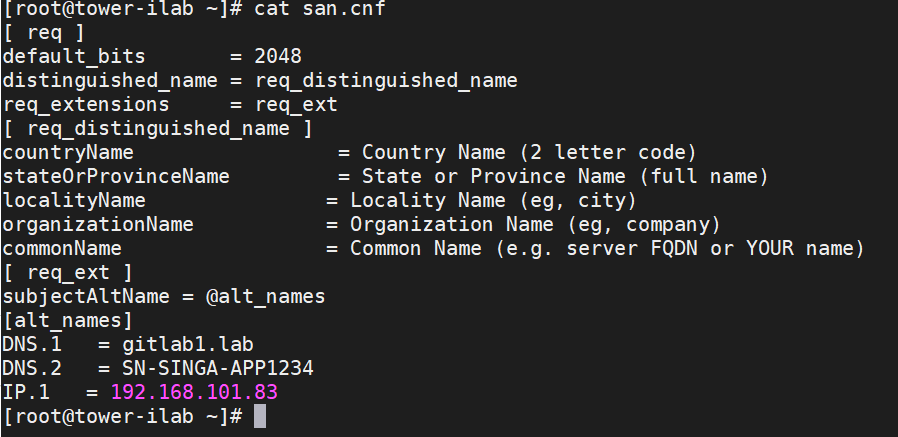
- Create san.cnf File:
Prepare a san.cnf file with appropriate Subject Alternative Names (DNS/IP).
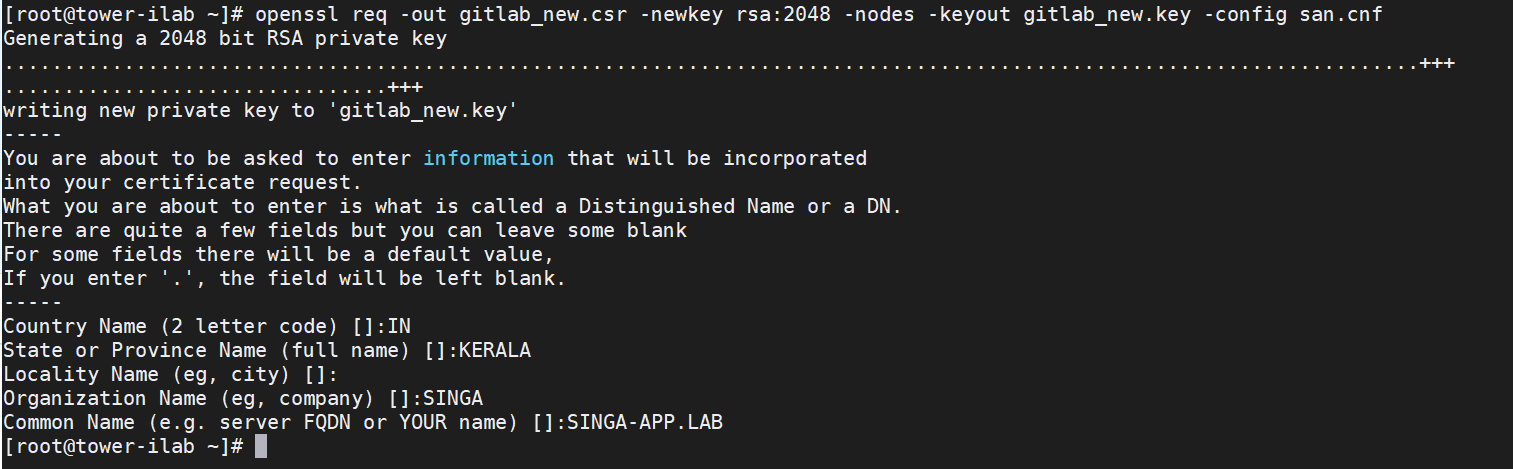
- Generate CSR:
Utilize the following command to generate the Certificate Signing Request (CSR):
openssl req -out gitlab_new.csr -newkey rsa:2048 -nodes -keyout gitlab_new.key -config san.cnf
- Secure Storage:
Save the generated CSR and key securely for future reference.

- CSR Verification:
Verify your CSR with the command:
openssl req -noout -text -in <CSR file> | grep DNS

- Send CSR to Signing Authority:
Share the CSR (e.g., gitlab_new.csr) with the certificate signing authority for certificate issuance.
B) Obtain the Certificate:
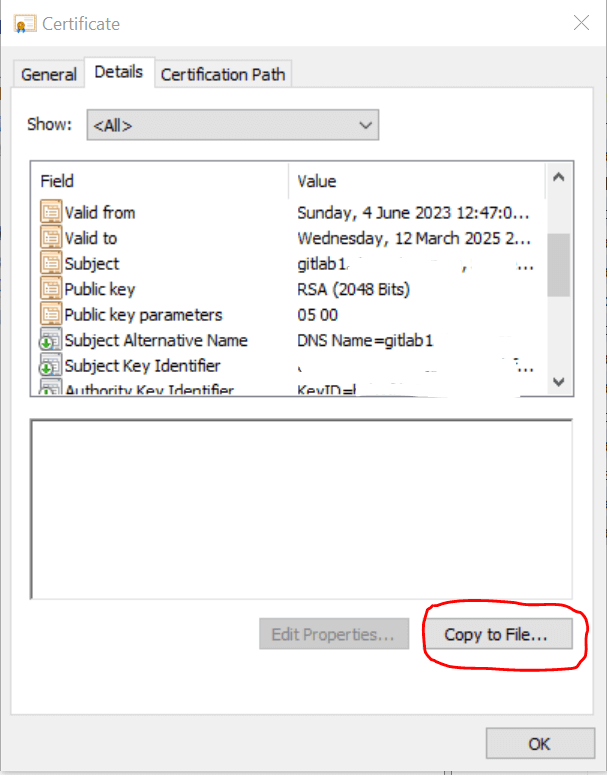
Follow the certificate conversion process from .crt to .cer using the Certificate Wizard.
Double-click on the *.crt file to open it into the certificate display.
- Select the Details tab, then select the Copy to file option.
-
Choose next on the Certificate Wizard
-
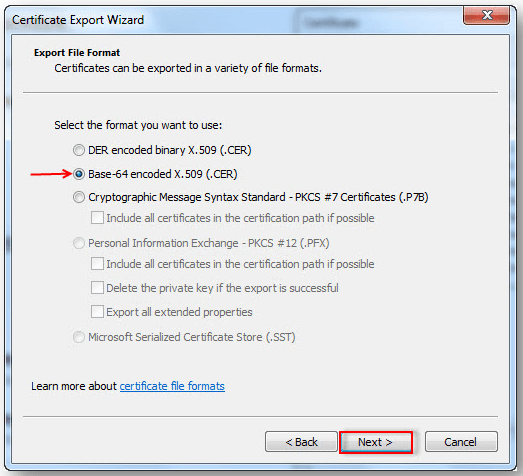
Select Base-64 encoded X.509 (.CER) in the File format window , then Next.
-
Select Browse (to locate a destination) and type in the filename.
-
Choose Next, then the certificate file with the format .cer will be saved in the selected destination.
Verification
Use the command below to verify your cert:
openssl x509 -in -text -noout
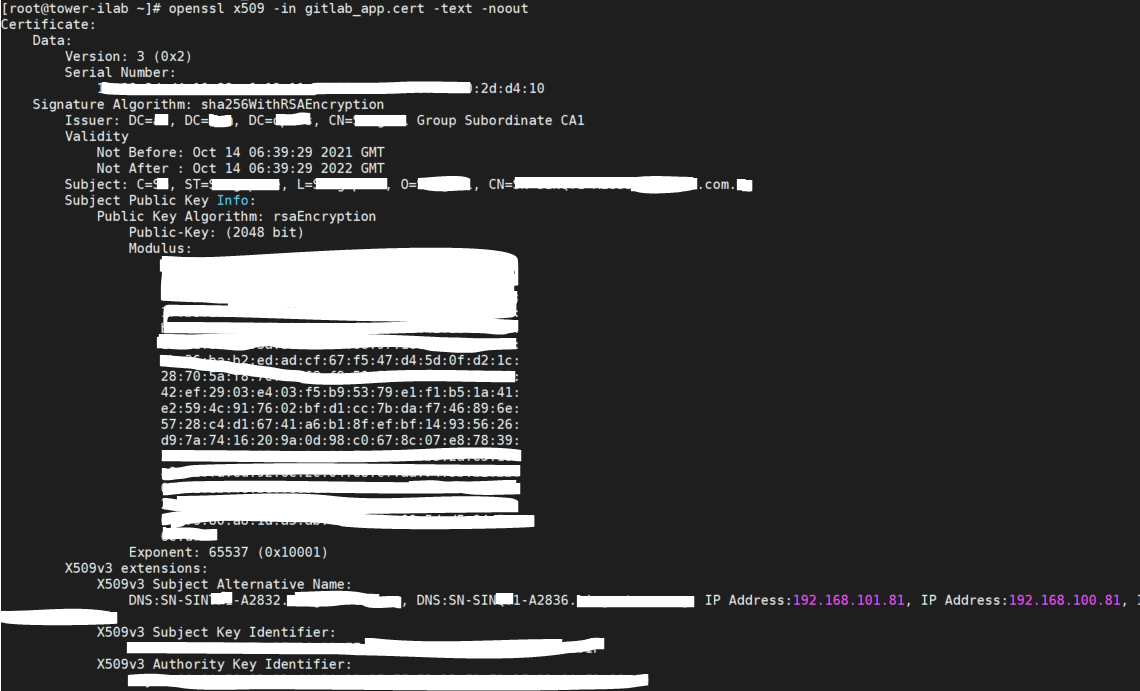
C) Install the Certificate:
- Copy the obtained certificate to the designated folder within the application configuration directory. For example, GitLab uses /etc/gitlab/trusted-certs/.
Verification:
Ensure the successful installation of the certificate using the command:
openssl x509 -in <CERT file name> -text -noout
Conclusion
Efficient SSL certificate management is crucial for secure online communication. Utilizing SAN during the renewal process not only simplifies the management of multiple domain names but also enhances the flexibility and versatility of SSL certificates. By streamlining the renewal process, organizations can ensure the seamless operation of secure applications and websites.
Raman G A
Kubernetes|DevSecops|Ansible|Openshift|CKA|Information Security|Identity and Access.
Note
Disclaimer: The views expressed and the content shared in all published articles on this website are solely those of the respective authors, and they do not necessarily reflect the views of the author’s employer or the platform. We strive to ensure the accuracy and validity of the content published on our website. However, we cannot guarantee the absolute correctness or completeness of the information provided. It is the responsibility of the readers and users of this website to verify the accuracy and appropriateness of any information or opinions expressed within the articles. If you come across any content that you believe to be incorrect or invalid, please contact us immediately so that we can address the issue promptly.