This page is part of my #100DaysOfLinkedIn series — 100 practical tips to help you build a stronger, more visible LinkedIn presence.
I am not a career coach or advisor. But after receiving hundreds of messages asking for LinkedIn profile reviews, I figured the best way to help was to write it all down in one place. These are the things I actually look for, the mistakes I see most often, and the small changes that make a real difference.
Take what works for you, skip what doesn’t, and feel free to share your own tips in the comments below.
Do you have more tips? Share in the comment box, will include it in the series.
Tip
This is a living article and the author will modify the content whenever there are updates and changes.
100 Days of Linkedin
Some of the tips are very optional and may contain privacy-related settings; use it at your own risk!
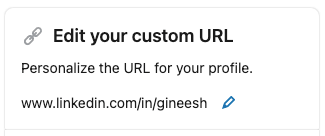
Day 01 – Personalize the URL for your profile
It is easy to share the URL with a recruiter or to your friend for referring to a job!
Day 02 – Use a smart looking photo or professional picture as your Profile Photo
- Linkedin is not Facebook!
- If I am the recruiter or hiring manager, I prefer to see a photo of a professional rather than an anonymous head, some random selfies, flowers, or baby pics…..
- It is a small space, try head-shots so that others can see your face 😀
- Also, adjust the visibility to “Anyone” so that people (recruiters or hiring managers who are not in your connection) can see your profile clearly. Thinking about privacy too much? Sorry, delete your Linkedin profile ASAP!
Day 03 – Add your core skills to your profile
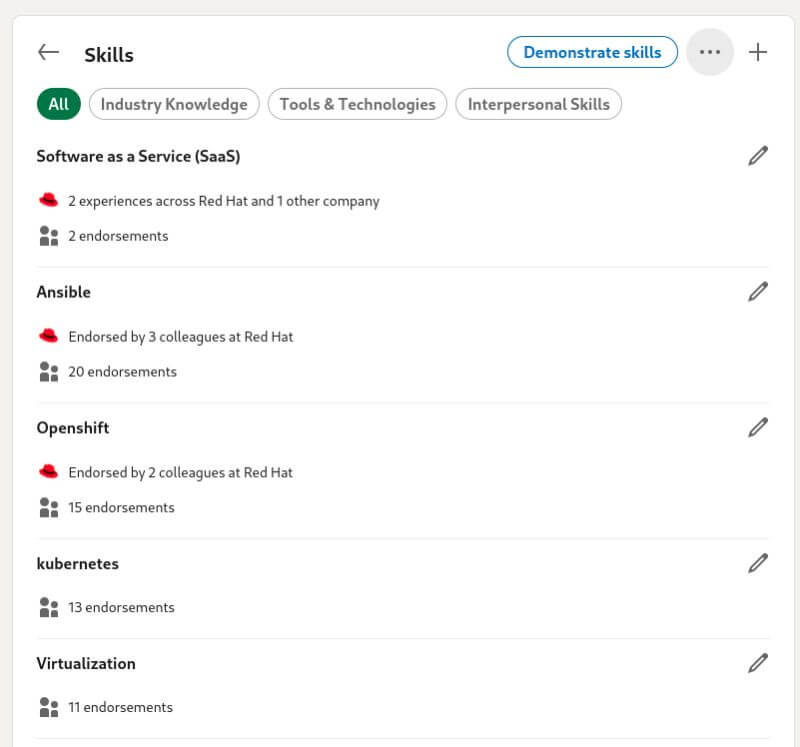
- Skill matching is an important feature!
- It will help to find the right job based on your skill matching.
- Help other people to endorse you on your specific skills.
- Use the LinkedIn skill assessment feature (free) to show your capabilities and expertise.
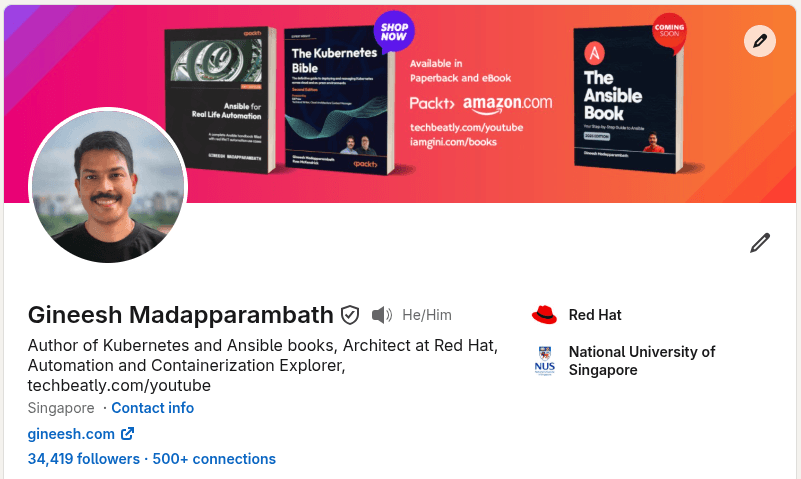
Day 04 – Use an appropriate cover image (Background photo) to make your profile stand out

- The background photo can boost your profile as this is a great place you can show your “profile nature” or your skill.
- You can add your skill-related details there
- You can use your company image to highlight where you are working.
- Are you a speaker? use a photo of you speaking at events. Don’t think it is a shame 😀
- Are you a blogger? Create a background photo with your blog/site details.
- How to get or create Background photos? Use free online tools (browser based) such as canva[.]com
- Don’t know what to use? Use some free images (workspace, coding screen) something is better than the dummy image!
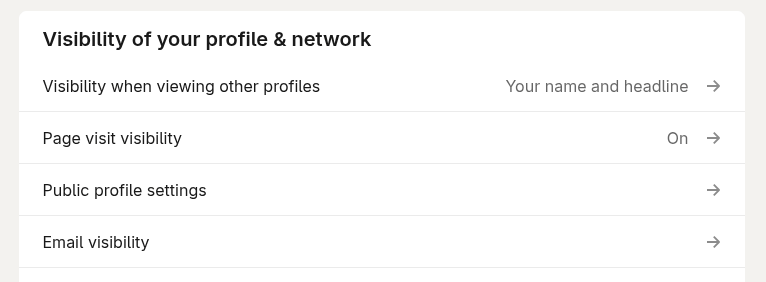
Day 05 – Make your profile public
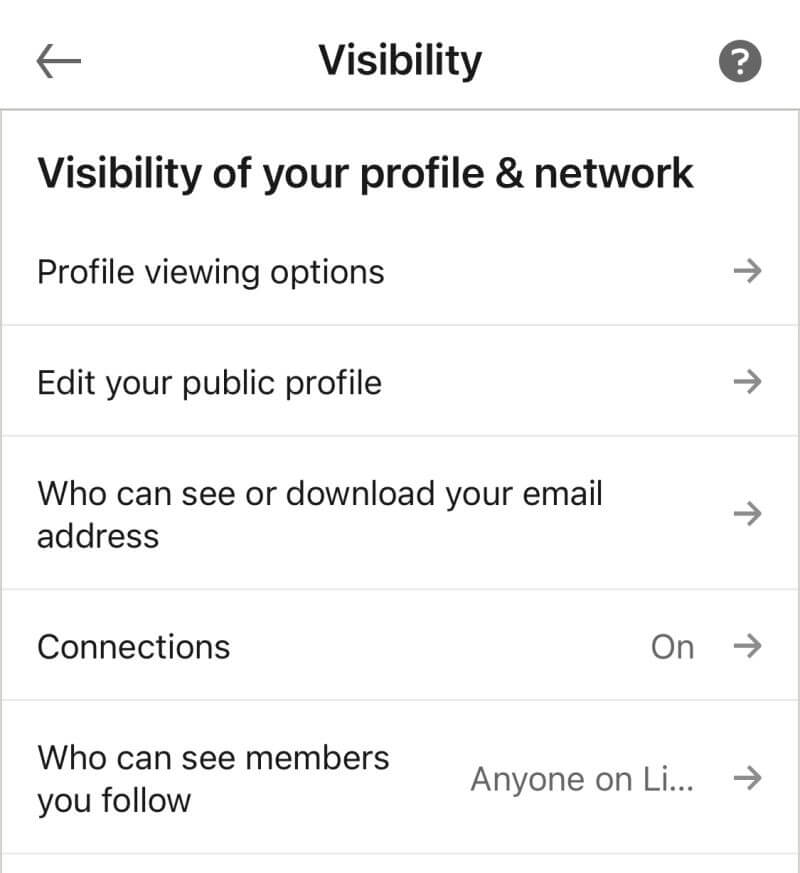
Why?
- if the hiring manager or recruiter is not your connection then they might not be able to see your profile and details.
- Helps to improve search results with your profile.
- You can use your profile as a “public resume website”.
Day 06 – Write a professional Summary; brief but detailed
- This is your best opportunity to explain about you what and who.
- This is the “About” section you can use for explaining your achievements, and your strengths.
- Check the samples from other profiles and get inspiration from them.
- Tell others, what you are, what you can do and what you want to do.
Day 07 – Show your current company information in the profile intro
- Easy for others to identify your company information.
- Help your colleagues/co-workers from a different location to identify you.
- Helps to boost your profile intro (the first view)
- Hide it only if you have a restriction from your employer side.
Day 08 – Write a professional Summary; brief but detailed
- This is your best opportunity to explain about you what and who.
- This is the “About” section you can use for explaining your achievements, and your strengths.
- Check the samples from other profiles and get inspiration from them.
- Tell others, what you are, what you can do and what you want to do.
Day 09 – Remove unwanted details from your name
- Better to keep the first name, second name (and option middle name if any)
- Adding other names may confuse others while addressing
- Adding other details in the name may create fancy profiles which are not good for professional profiles
- Not good for search engine results
- Not good for search results
Day 10 – Add a good headline
- Helps others to understand what you do.
- It can be your job role (eg: Systems engineer at ABC Inc)
- But add some text to tell what you are good at
- Add text for what you are doing
- Highlight your core skill and core area
Day 11 – Share or re-post related content regularly
- Helps others to understand what are your focused topics.
- People get benefit from your posts
- It can be learning materials, your achievement, work…
- Sharing is caring!
Day 12 – Like and React to the posts
- A liked post will pass along the social activity of the original post.
- Found a good post? use the reactions to add like/support
- The post may reach your connection as well
- The “author” of the post will get more motivation to share such posts again
Day 13 – Comment on the posts
- More profile visibility
- The post will reach your connections as well
- The “author” of the post will get more motivation to share such posts again
- More engagement on the posts
- Real-time feedback on the post
- Good to start discussions
Day 14 – Avoid typos everywhere
- Activate browser-based spelling and grammar checks.
- Use tools such as Grammarly
- Use the right capitalization for names, technologies etc
- Check the right usage of words and tips 🙂
Day 15 – Add keywords in your profile, summary and career history description
- You can highlight what topic you are good at
- The right word for your skills
- Will help the recruiters to identify your skill
- Explore Linkedin SEO 🙂
Day 16 – Write a catchy About section
- Polish it every day!
- It is the best place to show what you are and what are your core areas.
- Will help the recruiters to identify your core skills
Day 17 – Add featured posts

- Showcase your best post.
- Can be your achievement post
- Can be the one with the most impressions.
- Change and sort it whenever there are new important posts available.
Day 18 – Update “Open to work” without the frame
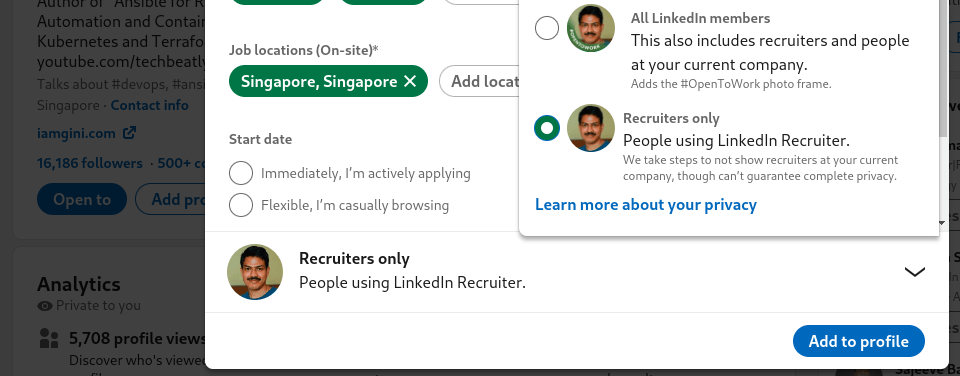
- Let the recruiters know that you are looking for opportunities.
- No need to show the “green” frame on your profile picture.
- Reach out to connections for references when you found a job, but make sure you have the skillset for that!
Day 19 – Tag or mention relevant people in your posts and comments
- When you write about someone’s project, idea, or achievement — tag them!
- This notifies them and brings them into the conversation.
- Your post gets exposed to their network too, increasing your reach.
- Don’t abuse it though — only tag people who are genuinely relevant to the content.
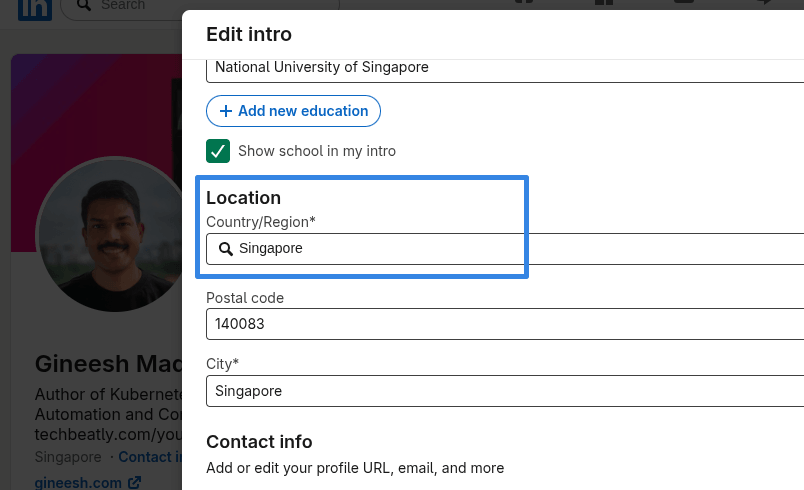
Day 20 – Show your current location on your profile
- Your location helps LinkedIn surface your profile in local and regional searches.
- Recruiters often filter by location — don’t be invisible to them.
- Keep it updated if you relocate or switch to remote work.
- It also helps connections identify you in a professional context.
Day 21 – Add your contact information
- Go to your profile and fill in the Contact Info section properly.
- Add your professional email, website, phone (if comfortable), and social handles.
- Recruiters and clients often go here first before sending a connection request.
- Make it easy for the right people to reach you outside of LinkedIn.
Day 22 – Share your LinkedIn articles externally with a preview or poster
- When you publish an article on LinkedIn, don’t let it sit there quietly.
- Share the link on Twitter/X, in newsletters, in WhatsApp groups, or as a blog post.
- LinkedIn articles are indexed by Google — they can drive traffic to your profile!
- Create a simple visual poster (try Canva!) to promote the article on other platforms.
Day 23 – Allow others to tag you in posts and comments
- Check your privacy settings and enable mentions from connections or everyone.
- Being tagged in relevant content boosts your visibility significantly.
- It also signals social proof — others think of you when they write about a topic.
- Go to Settings > Visibility > Mentions and Tags to review your current setting.
Day 24 – Add your email so recruiters can find and contact you
- LinkedIn messages don’t always reach people promptly.
- Add a professional email in your Contact Info section.
- This is especially important if you are actively open to opportunities.
- Use a professional email — not your old college username from 2008 😄
Day 25 – Add your phone number for direct recruiter contact
- If you are actively job searching, a phone number speeds up initial outreach.
- Recruiters appreciate being able to call directly without going through InMail.
- Not comfortable sharing publicly? Add it but keep visibility limited to connections only.
- You can always remove it once you have secured the right role.
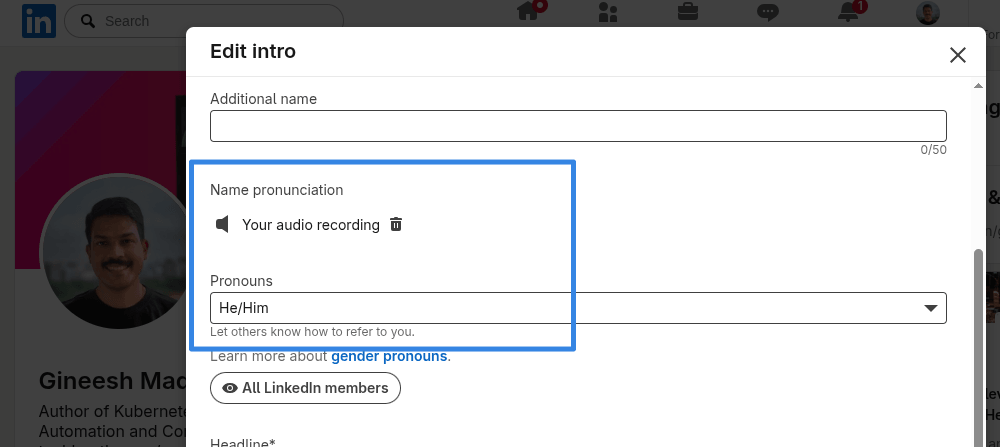
Day 26 – Add your name pronunciation
- LinkedIn allows you to record a short audio clip of how your name is pronounced.
- If your name is commonly mispronounced — especially across cultures — this is a great feature.
- It makes a warm first impression and avoids awkward moments in interviews or calls.
- Go to your profile intro section and look for the “Add name pronunciation” option.
Day 27 – Post text-first rather than always leading with a link
- LinkedIn’s algorithm deprioritizes posts that push people off the platform immediately.
- Write your key message or insight in the post body first.
- If you want to share a link, drop it in the first comment and reference it in the post.
- Posts with “link in comments” consistently get more reach than direct link posts.
Day 28 – Create fresh, original posts based on your experience
- Resharing others’ content is fine, but original posts perform far better.
- Share your lessons, your mistakes, your opinions, your process.
- You don’t need to be famous or senior — your unique experience has value.
- Authenticity drives engagement much more than polished corporate updates.
Day 29 – Keep your Experience section professional and genuinely useful
- Don’t list every role you have ever had — curate it.
- Focus on positions relevant to where you are and where you want to go.
- Write achievement-focused descriptions, not just a list of job duties.
- Use numbers and outcomes where possible: “reduced deployment time by 40%” beats “managed deployments”.
Day 30 – Match your LinkedIn career history with your CV/Resume
- Inconsistencies between LinkedIn and your CV are a red flag during hiring.
- Dates, job titles, company names, and responsibilities should all align.
- Recruiters cross-reference both — don’t give them a reason to question your credibility.
- A quick annual review of both documents together keeps things consistent.
Day 31 – Add links and media to your Experience entries
- For each relevant role, attach supporting content — project links, articles, slide decks, or case studies.
- This transforms your Experience section from a list into a mini portfolio.
- It gives hiring managers something tangible to evaluate beyond your descriptions.
- Even a link to a public company project or press release adds credibility.
Day 32 – Add volunteer experience
- Volunteering reflects character, community involvement, and skills that may not appear in your formal work history.
- Many hiring managers value this — it shows you contribute beyond your job.
- LinkedIn has a dedicated Volunteer Experience section — use it!
- Even occasional contributions (mentoring, open-source, NGO support) are worth adding.
Day 33 – Keep your Education section complete and accurate
- Add your degree, institution, years attended, and any notable achievements.
- Include relevant courses, honors, thesis topics, or extracurricular activities.
- For recent graduates, this section carries significant weight with recruiters.
- Don’t leave it blank — even if you have years of experience, education context matters.
Day 34 – Avoid fancy symbols or special characters in your name or headline
- Unicode symbols (✅ ★ 🔥 💼) in your name or headline might look eye-catching but hurt searchability.
- They can appear unprofessional in certain contexts and render poorly on some devices or systems.
- Your name should be clean and easy to find in a search — keep it simple.
- Save the creative formatting for your posts, not your identity fields.
Day 35 – Grow your network intentionally
- Connect with colleagues, classmates, industry peers, speakers, authors, and people in roles you aspire to.
- Quality matters — but don’t be so selective that your network stays too small to be useful.
- A larger, relevant network expands who can find you and who sees your content.
- Aim for 500+ connections as a foundation — LinkedIn labels these profiles as “credible” in search results.
Day 36 – Bookmark posts and read them later
- Found a great post but no time to engage right now? Hit the “Save” button.
- Use saved posts as a reference library for your own content ideas.
- Revisit them when you have time to leave a thoughtful comment.
- Go to “My Items” > “Saved Posts” to find everything you have bookmarked.
Day 37 – Link your YouTube channel if you create video content
- If you produce tutorials, talks, demos, or any professional content on YouTube — link it!
- Add it in your Featured section or contact info.
- Cross-platform presence builds credibility and shows you invest in sharing knowledge.
- Even a few quality videos make a stronger impression than no video presence at all.
Day 38 – Add your website or blog to your LinkedIn profile
- Whether it is a personal portfolio, a technical blog, or a company page — add the URL.
- This drives traffic in both directions: LinkedIn visitors can explore your work, and website visitors can connect with you.
- Add it under Contact Info > Website.
- If you have multiple sites, pick the one most relevant to your professional goals.
Day 39 – Endorse others’ skills genuinely
- If someone in your network is genuinely skilled at something — endorse them for it.
- Endorsements are visible on profiles and create real goodwill.
- People you endorse often reciprocate, which grows your own visible skill set.
- Be specific — endorse the skills you have actually seen them demonstrate, not just random ones.
Day 40 – Share your community activities and involvement
- If you speak at meetups, organize events, run workshops, or contribute to open-source or professional communities — post about it!
- These activities build authority and show you contribute beyond your job description.
- It also attracts like-minded people to your profile and network.
- Don’t be shy — your community involvement is part of your professional identity.
Day 41 – Avoid discussing politics and religion
- LinkedIn is a professional platform — political and religious opinions can alienate professional contacts.
- However sincerely held, these topics create unnecessary friction in a professional space.
- Focus your posts on your professional identity, expertise, and contributions.
- Save those conversations for the right time and place — LinkedIn is not it.
Day 42 – Be a visible voice for your employer (wisely)
- Sharing company news, product launches, team milestones, and industry contributions positions you as an engaged professional.
- It shows loyalty, awareness, and that you care about more than just your own brand.
- Always check your organization’s social media guidelines first.
- A thoughtful employee advocacy post benefits both you and your company’s visibility.
Day 43 – Avoid leaving dismissive or hostile comments
- Disagreement is healthy — hostility is not.
- If you challenge a point of view, do so with data, context, or personal experience.
- Hostile or dismissive comments travel fast and damage your professional reputation permanently.
- Ask yourself: would I say this in a job interview? If not, don’t post it.
Day 44 – Send personalized messages — not just “Hi”
- A blank connection request or a one-word “Hi” message almost never gets a response.
- Include context: why are you reaching out? What do you have in common?
- What value can you offer or exchange?
- A specific, thoughtful message has a dramatically higher response rate — and a much better first impression.
Day 45 – Add certifications accurately and completely
- Add the certification name, issuing organization, issue date, and credential ID where available.
- Don’t list expired certifications as currently active — it is misleading.
- LinkedIn has a dedicated Licenses and Certifications section — use it properly.
- Recruiters and hiring managers do verify these, especially for technical roles.
Day 46 – Share certification posts with a story and useful details
- When you earn a new certification, don’t just post a badge image and call it done.
- Write about why you pursued it, what you learned, how long it took, and what resources helped.
- Share tips for others who are considering the same certification.
- These posts consistently perform well and build genuine authority in your field.
Day 47 – Use the LinkedIn job-skill match tool
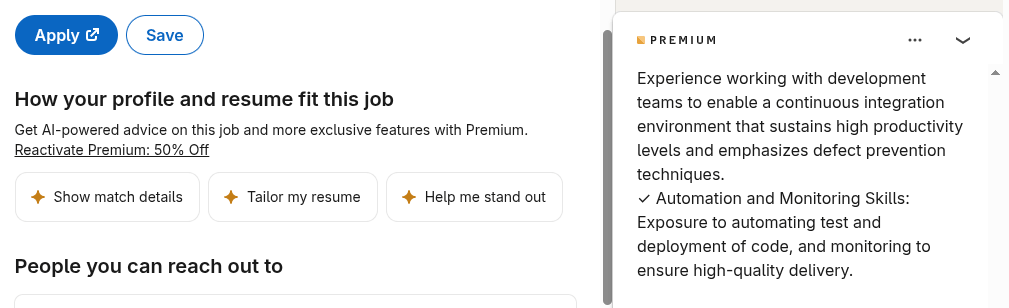
- LinkedIn shows a match percentage between your profile skills and job descriptions.
- Use this to identify gaps — what skills are appearing in jobs you want but missing from your profile?
- It is a free, built-in personal skills audit — take advantage of it.
- Go to any job listing and look for the “Skills Match” or “How you match” section.
Day 48 – Add projects to your profile
- LinkedIn has a Projects section where you can describe specific initiatives you have worked on.
- Add collaborators, dates, links to the project or any related content.
- This adds context to your work history and highlights what you have actually built or shipped.
- Side projects, open-source contributions, and personal tools all count here.
Day 49 – Add interests thoughtfully
- The Interests section — companies, schools, influencers, and groups you follow — is visible to others.
- Follow organizations and people that genuinely reflect your professional interests.
- Avoid following things that have no relevance to your professional identity.
- This section quietly signals what you care about — make sure it reflects the real you.
Day 50 – Join relevant LinkedIn Groups
- Groups are spaces where professionals in the same field or with shared interests gather.
- Joining and participating in relevant groups increases your visibility beyond your immediate network.
- You get access to niche discussions, job posts, and potential connections outside your current circle.
- Search for groups related to your industry, skills, or the communities you are part of.
Day 51 – Use LinkedIn beyond just job searching
- LinkedIn is where thought leadership is built, clients are found, and partnerships start.
- If you only open the app when you are job hunting, you are missing most of its value.
- Show up consistently — post, engage, learn, connect — whether you need something or not.
- The people who get the best opportunities from LinkedIn are the ones who are already there when they arrive.
Day 52 – Use job search filters effectively
- Broad, unfiltered job searches waste time and surface irrelevant roles.
- Use filters for location, experience level, date posted, company size, and work type (remote/hybrid/on-site).
- Save your filtered searches and set up alerts so new matching roles come to you automatically.
- The more specific your filters, the more relevant your results.
Day 53 – Join professional communities and share about your involvement
- Many industries have active communities on LinkedIn and beyond — developer communities, DevOps groups, cloud practitioner circles, and more.
- When you join one, post about it: what the community is about, what you learned, who you met.
- This shows active engagement and invites others with similar interests to connect with you.
- Your involvement is content — don’t keep it to yourself.
Day 54 – Attend virtual events and meetups and share your takeaways
- LinkedIn Events and external meetups give you conversation starters, learning content, and networking opportunities.
- When you attend something interesting, share your top three takeaways in a post.
- Your network benefits from your insights — and you reinforce your own learning in the process.
- Tag the event organizer or speakers — it extends your post’s reach and starts conversations.
Day 55 – Add a short video introduction to your profile
- LinkedIn allows a short profile video (via Creator Mode) where you introduce yourself and invite people to connect.
- A 30–60 second video humanizes your profile in a way no text or photo can match.
- Talk about who you are, what you do, and what kind of connections or opportunities you are looking for.
- Keep it natural — you don’t need a studio setup, just good lighting and a clear voice.
Day 56 – Enable Creator Mode
- Creator Mode shifts your profile focus from “resume” to “content creator”.
- It changes your Connect button to Follow, making it easier for people to follow your content without a connection request.
- It unlocks access to LinkedIn Live, Newsletters, and audio events.
- Enable it under your profile dashboard if you post content regularly.
Day 57 – Add your top hashtags in Creator Mode
- When you enable Creator Mode, you can select up to five hashtags that represent your content themes.
- These hashtags appear on your profile and help LinkedIn surface your content to the right audiences.
- Choose hashtags you will consistently write about — not just popular ones.
- Think of them as your content “specializations” visible to anyone who visits your profile.
Day 58 – Start a LinkedIn Newsletter
- Newsletters are recurring publications that go directly to subscribers’ notifications and email inboxes.
- They build a dedicated audience separate from your general network.
- If you have something to say on a topic regularly — technical guides, career tips, industry commentary — a Newsletter is one of the most powerful tools on the platform.
- Once someone subscribes, your next issue lands in their inbox automatically.
Day 59 – Try LinkedIn Live for real-time engagement
- LinkedIn Live generates significantly more reactions and comments than pre-recorded or uploaded video.
- Host AMAs, panel discussions, product walk-throughs, or interview-style conversations.
- You need Creator Mode enabled to go live.
- Start small — even a 20-minute solo session on a topic you know well is a great first LinkedIn Live.
Day 60 – Experiment with document posts and carousels
- PDF uploads displayed as swipeable carousels are among the highest-performing content formats on LinkedIn.
- Use them for step-by-step guides, listicles, case studies, cheat sheets, or frameworks.
- They encourage saves and shares far more than single images or plain text posts.
- Create them in Canva, PowerPoint, or any design tool and upload as a PDF directly.
Day 61 – Use polls to spark conversation
- LinkedIn polls are low-effort for your audience and generate strong engagement.
- They invite a reaction without requiring much effort — people love a quick vote!
- Use them to test ideas, gather opinions, or start a discussion on a relevant topic.
- Follow up with a post sharing what the poll results told you — that second post often performs even better.
Day 62 – Try LinkedIn Audio Events
- Audio Events are live, voice-based conversations — think of it as a virtual roundtable.
- They feel less produced and more conversational than video, which can attract a different kind of engagement.
- Great for Q&A sessions, community discussions, and casual industry conversations.
- Good option if you are not comfortable on camera but want to engage your audience in real time.
Day 63 – Track your post and profile analytics regularly
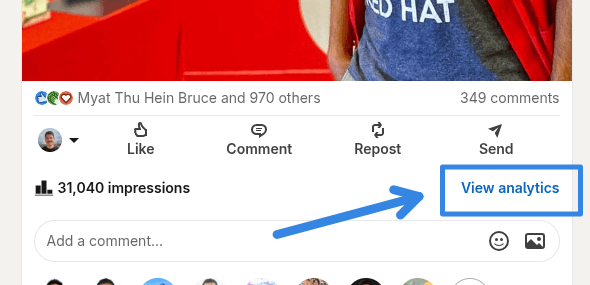
- LinkedIn provides post-level and profile-level analytics — use them!
- Check which content gets the most impressions, saves, comments, and profile visits.
- Use this data to understand what genuinely resonates — not to chase virality, but to improve over time.
- Even a quick 5-minute review after each post will sharpen your content strategy significantly.
Day 64 – Respond to every comment on your posts
- Especially in the first few hours after publishing — this is critical.
- LinkedIn’s algorithm treats comment activity as a strong engagement signal.
- Responding to comments keeps the conversation alive and extends your post’s reach.
- Even a short, genuine reply is better than silence — it shows you are present and engaged.
Day 65 – Engage with others’ posts before and after you publish your own
- Spend 10–15 minutes engaging with content in your feed right before and after you post.
- This warms up the algorithm and puts your name in front of more people at exactly the right moment.
- Leave real, thoughtful comments — not just “great post!” or emoji reactions.
- Add your perspective, share a related experience, or ask a genuine follow-up question.
Day 66 – Post consistently on a schedule you can actually maintain
- Three to four times a week is widely recommended — but consistency matters far more than frequency.
- One post published reliably every week will outperform five posts one week and nothing for three weeks.
- Pick a schedule that fits your life and stick to it — your audience will know when to expect you.
- Even a short, honest three-sentence observation about your field counts as a post.
Day 67 – Keep text posts in the 1,200–1,600 character sweet spot
- This length is long enough to deliver real value but short enough to hold attention.
- Use line breaks generously — walls of text get scrolled past on LinkedIn.
- White space is your friend. Short paragraphs. One idea per line.
- The “see more” click happens around 210 characters — make those first lines count.
Day 68 – Don’t post again within 18 hours of your previous post
- Posting too frequently in a short window suppresses both posts algorithmically.
- LinkedIn distributes reach over time — give each post room to breathe and perform.
- Space your content out. If you have a lot to say, save some for tomorrow.
- Quality per post matters more than volume per day.
Day 69 – Share your failures, not just your wins
- Posts about mistakes, failed projects, hard lessons, and career pivots consistently outperform purely promotional content.
- Vulnerability and honesty build trust faster than credentials and achievements.
- You don’t need to overshare — just be real about what went wrong and what you learned.
- These are the posts people save, share, and message you about privately.
Day 70 – Build a content series around your expertise
- A recurring series — weekly tips, tool breakdowns, career stories, industry observations — builds an audience that comes back for more.
- It also makes content planning easier because the format is already decided for you.
- Give your series a name and a consistent hashtag.
- Even a 10-part series on something you know deeply can become a significant piece of your personal brand.
Day 71 – Use native video for tutorials and quick insights
- Native video (uploaded directly to LinkedIn) performs far better than links to YouTube or Vimeo.
- Keep it under 90 seconds for maximum completion rates.
- Start with your key point in the first three seconds — don’t wait to deliver value.
- Short-form video under 30 seconds achieves 200% higher completion rates than longer formats.
Day 72 – Repurpose your best content across formats
- A LinkedIn article can become a carousel. A carousel can become a series of text posts. A text post can become a newsletter issue.
- Repurposing is not lazy — it reinforces key ideas for different segments of your audience.
- Not everyone sees every post — repeating your best ideas in a new format reaches people who missed it the first time.
- Your most-saved and most-commented posts are the best candidates for repurposing.
Day 73 – Use hashtags purposefully — not excessively
- Three to five relevant hashtags per post is the recommended range.
- More than that looks spammy and dilutes your focus.
- Research which hashtags in your niche have active communities rather than just picking the most popular ones.
- Check a hashtag’s follower count on LinkedIn before committing to it.
Day 74 – Time your posts for when your audience is most active
- For most professional audiences, Tuesday through Thursday mornings tend to see higher engagement.
- Check your own LinkedIn analytics to find what works specifically for your network.
- Consistency at a regular time trains your audience to expect and look for your content.
- Scheduling tools like Buffer or LinkedIn’s own scheduler can help you post at optimal times without being online.
Day 75 – End your posts with a specific, genuine question
- A question at the close of a post invites responses and drives comment activity.
- Avoid generic closers like “What do you think?” and ask something specific instead.
- Example: “Have you faced this challenge in your team? How did you solve it?” works far better.
- The more specific the question, the more specific — and valuable — the responses you get.
Day 76 – Use AI tools to draft posts, but add your own voice
- AI tools can help you overcome writer’s block, structure your ideas, and clean up drafts.
- But posts that perform best are the ones with your personal experiences, opinions, and earned insights.
- Use AI as a starting point, not a replacement for your voice.
- Read it back out loud — if it doesn’t sound like you, rewrite it until it does.
Day 77 – Set up job alerts for your target roles
- Don’t manually search for jobs every day — let LinkedIn do it for you.
- Set up alerts for specific job titles, companies, and locations.
- You will be notified when new matching roles are posted — often within minutes.
- Being among the first to apply significantly increases your chances of getting noticed.
Day 78 – Research companies before applying or connecting
- Before you apply to a role or reach out to someone at a company — study their LinkedIn page.
- Look at recent posts, company size, employee growth trends, and what current employees are saying.
- Going in informed shows initiative and helps you ask better questions in interviews.
- It also helps you decide if it is actually a place you want to work before investing time in an application.
Day 79 – Use LinkedIn’s salary insights tool
- LinkedIn provides salary range data for many job listings based on aggregated user data.
- Use this to calibrate your expectations before you get to the compensation conversation.
- It helps you know when a listed range is below market — and when it is competitive.
- Available on most job listings — look for the “Salary” section on the job detail page.
Day 80 – Follow companies in your target industry
- Following a company keeps you updated on their announcements, job openings, and culture signals.
- It signals interest — and when you eventually apply or reach out, you will have context.
- Follow competitors too — it helps you understand the landscape and spot trends.
- Use the “Notifications” bell on company pages to get alerts for their new posts.
Day 81 – Reach out to employees before you apply
- A warm introduction from a current employee dramatically increases your chances of getting noticed.
- Before applying to a role, check if you have any first or second-degree connections at that company.
- Reach out with a genuine, specific message — not a copy-paste template.
- Even a brief exchange gives you an internal perspective and often leads to a referral.
Day 82 – Use LinkedIn to prepare for interviews
- Research your interviewer’s profile before the meeting — their background, recent posts, career path.
- Look at the company’s LinkedIn page for recent announcements, values, and team culture signals.
- Check for shared connections who might give you an honest inside view.
- Walking into an interview knowing this context sets you apart from candidates who only read the job description.
Day 83 – Ask for recommendations from people who know your work
- A written recommendation from a manager, client, or colleague is one of the most credible signals on a LinkedIn profile.
- Ask specifically — give the person context on what you would like them to highlight.
- Don’t just send a blank recommendation request — tell them what project or skill you’d love them to speak to.
- Two or three strong recommendations are worth far more than ten generic ones.
Day 84 – Write recommendations for others
- Giving is as important as receiving — write thoughtful recommendations for colleagues whose work you genuinely admire.
- Be specific: describe a particular project, a skill you witnessed in action, or the impact they had.
- Unsolicited recommendations are especially powerful — they carry more weight because the person did not ask for them.
- People you write for often reciprocate, which grows your own recommendation count organically.
Day 85 – Keep your profile updated even when you are not job searching
- The best time to have a polished profile is before you need one.
- Profiles that go dark for years and suddenly become active signal urgency — not confidence.
- Update your headline, add new skills, refresh your About section, and post occasionally even in stable periods.
- Opportunities find people who are already showing up — not just those who are actively looking.
Day 86 – Use LinkedIn Learning to build skills and add them to your profile
- LinkedIn Learning has thousands of courses across technical, professional, and creative topics.
- Completed courses can be added directly to your profile under Licenses and Certifications.
- More importantly, they help you close the skill gaps that keep showing up in job descriptions you care about.
- Cross-reference roles you want with their required skills — then find courses to bridge the gap.
Day 87 – Define and own a clear professional niche
- The professionals who build the strongest LinkedIn presence are known for something specific.
- Generalist profiles get lost — people who stand for a clear niche attract the right followers and opportunities.
- Think about the intersection of your skills, your experience, and what you genuinely want to be associated with.
- Your niche does not have to be narrow — but it should be clear and consistent.
Day 88 – Share your perspective, not just information
- Anyone can share a news article or repost a tip list.
- What makes your content valuable is your angle — what do you agree with, challenge, or add to the conversation?
- Opinion-based and experience-based posts consistently outperform neutral summaries and information shares.
- Your lived experience is your most unique content asset — use it.
Day 89 – Tell behind-the-scenes stories about your work
- People are genuinely curious about how things get made, solved, or built.
- How did you approach a difficult problem? What decisions went into a project? What surprised you?
- Behind-the-scenes content is engaging, relatable, and hard to replicate — because it is uniquely yours.
- It builds more trust than a polished case study ever will.
Day 90 – Collaborate with others on content
- Co-authored posts, collaborative articles, live interviews, and joint newsletters expose you to each other’s audiences.
- Look for peers and complementary voices to create content with — not just for.
- Tag your collaborators, mention your co-contributors, and cross-promote the result.
- Collaboration accelerates reach in a way solo posting simply cannot match.
Day 91 – Build a content pillar framework
- Choose three to five core themes you will consistently write about.
- Every post you create should fall within one of these pillars.
- This gives your profile a coherent, recognizable voice over time.
- It also trains your audience to know what to expect from you — which builds a following.
Day 92 – Track your Social Selling Index (SSI)
- LinkedIn provides a free SSI score at linkedin.com/sales/ssi.
- It measures four things: building your brand, finding the right people, engaging with insights, and building relationships.
- Use it as a benchmark and review it monthly to see which areas need attention.
- A higher SSI score correlates with better profile visibility and more inbound opportunities.
Day 93 – Engage with industry news and trending topics in your field
- When something significant happens in your industry — a new tool, a policy change, a major shift — share your take on it.
- Timely, relevant commentary positions you as someone actively engaged in your field, not just broadcasting evergreen tips.
- You don’t need to have all the answers — a genuine question or reaction post works just as well.
- Being part of the conversation when it is happening puts your name in front of new people.
Day 94 – Add AI and emerging tech skills to your profile
- AI literacy is now a recognized and valued professional skill across almost every industry.
- If you use AI tools in your daily work — for coding, writing, analysis, automation, or research — list them explicitly.
- Don’t just add “AI” generically — be specific: “Prompt engineering”, “GitHub Copilot”, “Claude”, “ChatGPT for workflow automation” etc.
- Professionals with demonstrable AI skills command significantly higher consideration in hiring and consulting in 2025 and beyond.
Day 95 – Treat the Featured section as a live portfolio
- The Featured section is prime profile real estate — don’t set it and forget it.
- Update it regularly to reflect your most recent and relevant work.
- Pin a recent article, a high-performing post, a certification, a project link, or a talk you delivered.
- Think of it as the first thing a curious visitor will click on — make it count.
Day 96 – Plan and batch-create your content weekly
- Set aside 1–2 hours once a week to plan and draft posts for the coming days.
- Batching reduces the daily pressure of figuring out what to say and helps you stay consistent.
- Keep a running list of post ideas — jot things down as they occur to you during the week.
- Scheduled content also means you post at optimal times, not just when you happen to be online.
Day 97 – Measure engagement rate, not just impressions
- Impressions feel good but they don’t tell the full story.
- Comments, saves, shares, and DMs generated by a post are far more meaningful signals.
- A post with 500 impressions and 30 comments outperforms one with 5,000 impressions and 2 likes.
- Track what content types and topics generate real conversations — and do more of that.
Day 98 – Do a quarterly audit of your LinkedIn profile
- Block 30–60 minutes every quarter to review your profile end to end.
- Update your headline, refresh your About section, add new experience or certifications, and remove outdated skills.
- Check that your Featured section still reflects your current best work.
- Your profile should evolve with your career — don’t let it fall behind who you are today.
Day 99 – Stay authentic — your LinkedIn presence is a long-term investment
- The professionals who build lasting influence on LinkedIn show up honestly and consistently over years — not the ones who go viral once.
- Resist the temptation to manufacture a persona or copy what seems to be working for others.
- Write about what you actually know, care about, and have experienced.
- Your authentic voice, sustained over time, is your most durable professional asset.
Day 100 – Remember: LinkedIn is a tool, not the destination
- Your LinkedIn profile opens doors — but the relationships, skills, and opportunities you build are what truly matter.
- Use it with intention. Show up with value. Engage genuinely.
- Don’t let the numbers (likes, impressions, followers) become the point — they are signals, not goals.
- The conversations, collaborations, and careers that start here all happen with real people on the other side of the screen. Make it count 🙂